Join us on an adventure around the world; travel throughout the US and abroad by cruise, plane, and train and take the vacations you've always dreamed about.
Planning an international trip is a very exciting time but it also takes a lot of preparation. You may want to learn a few key phrases in the local language. You might want to stock up on some local currency or map out your planned stops. A passport is definitely a must-have, but is a passport enough? Nothing would be worse than getting to the airport, excited and ready to see another country, and being turned away at the check-in counter. “I’m sorry, but you can’t board. You need a Visa.”
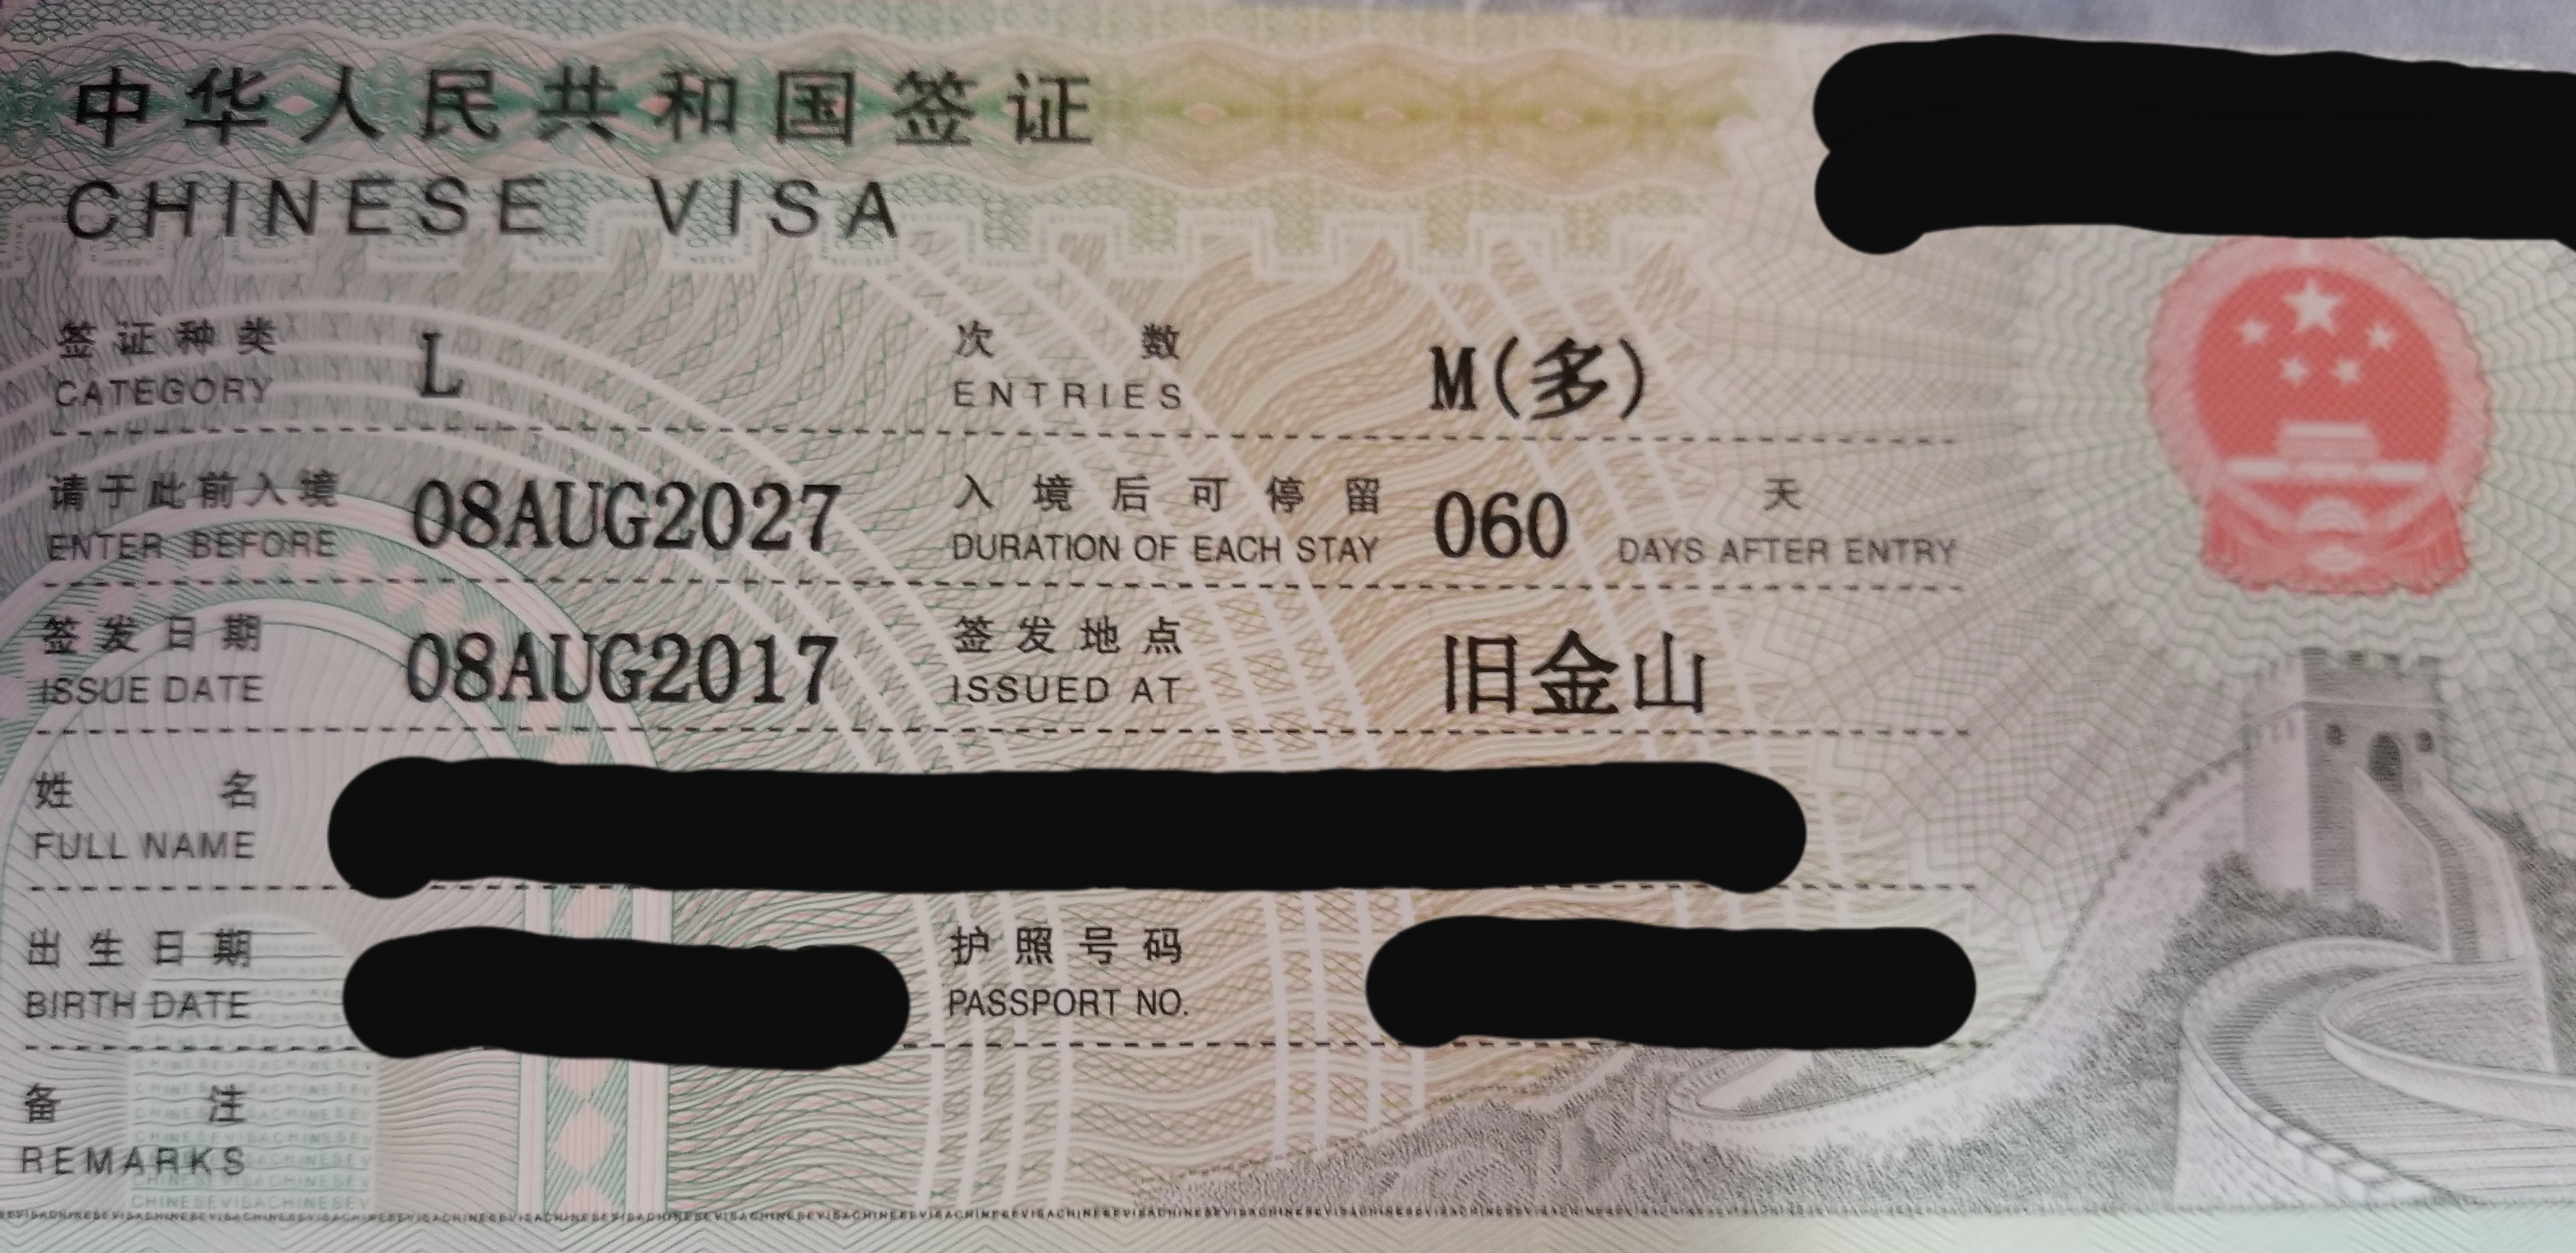
A Visa issued to visit China
What is the purpose of a Visa?
A Visa primarily serves as a way for a country to control who can and cannot enter. Visas often have certain restrictions on them, such as duration or purpose of visit. The specific Visa, if any, required for international travel will depend on three factors. 1) The country where you have citizenship. 2) The country you are traveling to. 3) The reason for your visit. It is important to note that you will need to apply these rules to every country you will be entering, even if it is not your final destination. For example, some countries will require a Visa even if you just have a short layover while flying to another country.
How do I know if I need a Visa?
We will be happy to help you determine the Visa requirements for any travel, but the best and most up to date source is your country’s immigration or consulate department. For United States citizens, this resource is the State Department. You can search for any country on the State Department’s website and find nearly all the travel information you will need. Not only will you find out if you need a Visa, but it will also display any travel advisories that are in effect, how long your passport has to be valid for, how many blank pages are required in your passport, and any monetary limitations on entering or exiting the selected country.
It is important that you check the rules for the country listed on your passport. It does not matter what country you are traveling from, or where you live. The only thing that matters is where you are actually a citizen.
How do I get a Visa?
Typically in order to get a Visa you must make an appointment at an embassy or consulate of the country you are visiting. Some countries also allow for you to apply for a Visa online or when your flight arrives in the country. If you are visiting a country that does not support Visa on Arrival or e-Visa programs, you may also be able to hire a Visa service. These are special companies located in major cities that are home to several embassies and consulates. They can take your passport and Visa application to the embassy in person and complete the process on your behalf. These services do, however, add some significant cost to the Visa application process. Still, if you do not live near an embassy it can be necessary.
This past Tuesday evening, a large underwater earthquake happened off the coast of Honduras. This earthquake led to the Tsunami Warning Center issuing a tsunami advisory for Puerto Rico and the Virgin Islands. While many people are familiar with hurricane season and some of the risks involved, tsunamis are less common. As a Weather Ready Nation Ambassador, we would like to make sure you are prepared and safe, no matter what mother nature may throw your way. Read on for information about these rare events and additional resources so you can be a tsunami ready traveler.
In This Post
Tsunami Information
What is a Tsunami?
When most people hear tsunami they initially think of a single massive wave that’s hundreds of feet tall. This visualization of a tsunami is popular in Hollywood for dramatic effect, but in real life such mega tsunamis are exceedingly rare. A tsunami is simply a series of waves caused by a large and sudden displacement of water in the ocean. Usually, this displacement is caused by an earthquake near the ocean floor, but anything that causes a sudden and large movement of water can trigger a tsunami. Other potential triggers include landslides, volcanic eruptions, explosions, and asteroid or meteor strikes.
Most tsunami waves are less than 10 feet tall when they reach land. This may sound minor, but the waves come in a series and often move at 20-30 miles per hour when they hit land. It only takes six inches of moving water to knock over an adult, and 2 feet of water can carry away most vehicles. Also important is the fact that tsunamis can be filled with a variety of debris. Unlike the typical wind driven waves seen at beaches, tsunami waves have no face and do not curl and break. Instead they are like a wall of water, carrying with it debris from the ocean, as well as debris from the land that washed back with a previous wave.
When and where do tsunamis strike?
Unlike other events, tsunamis do not conform to a typical “season” or region. A tsunami can strike any ocean coast and can even travel up rivers that feed into the ocean. The good news is that tsunamis are exceedingly rare. On average, two tsunamis hit land near their source per year. Approximately once every five years there will be a “distant” tsunami, or a tsunami that makes land fall more than 600 miles away from the source.
Since local tsunamis are more common than distant tsunamis, and earthquakes are the most common tsunami cause, the highest risk will be coastal communities that are near an active fault line. Earthquakes are hard to predict, but it is a good idea to know if you are traveling to an earthquake prone area. Most importantly, however, is to understand and respect the potential power of a tsunami. Don’t ignore them just because they are rare, and don’t be lulled into a false sense of security if you hear that the expected waves will only be a few feet high.
Understanding Tsunami Alerts
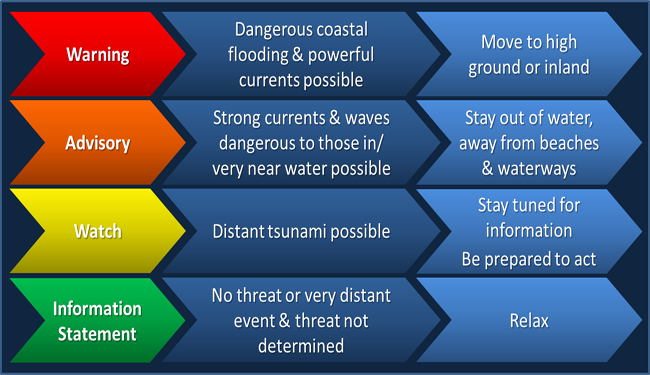
Tsunami Alert information courtesy of NOAA
The Tsunami Warning Center issues three different levels of tsunami alerts. In order of severity these are watches, advisories, and warnings. Any of these alerts can be downgraded, upgraded, or cancelled as more information becomes available, so it is important to stay tuned for any updates.
Tsunami Watch
A tsunami watch means that there is the possibility of a distant tsunami. Typically with a distant tsunami, you will have a lead time of at least an hour, but you should be prepared to take action if you are near a coast. There is no need to evacuate at this point, but you should definitely listen for more information, and be ready to evacuate if it becomes necessary.
Tsunami Advisory
At this level, a tsunami is either expected or is already occurring. With an advisory there is the potential for strong currents or waves dangerous to those in or near the water. Flooding of the immediate beach and harbor area is possible. If you are in an area under a tsunami advisory it is important that you get out of the water and stay out until given the all clear. Even if there are no visible waves, strong currents and sudden tides can cause drowning. There is also a risk of debris in the water that can cause serious injuries. You should move away from the beach and harbor area until local officials give the all clear.
Tsunami Warning
If you are placed under a tsunami warning you should move to high ground or far inland. A tsunami warning is issued when there is a tsunami that is expected to cause widespread flooding. A large tsunami can cause significant flooding more than a mile away from the water. This flooding and dangerous currents can last for hours or days, so it is crucial to listen to local officials. Stay away from the water and coastal areas until the warning is lifted. There is no way to tell visually if another wave is coming or not.
Traveling the world can give you a wide variety of unique experiences. While many of these experiences can come home with you only in the form of memories and photographs, there are some experiences that you can recreate from the comfort of your home. Food and drinks from around the world can be an excellent way to relive past adventures or have a mini adventure right at home. We’ve gathered up 5 of the best cocktails from around the world that you can enjoy no matter where you are.
Singapore Sling
Singapore Sling from Santosa | Courtesy Wikipedia
The Singapore Sling is a gin and cherry mixed drink that was invented in the early 1900s at the Raffles Hotel in Singapore. The exact original recipe is lost to time, but is generally agreed to be comprised of gin, cherry liqueur, and orange, pineapple, and lime juices. The modern recipe varies at various venues across Singapore, but the standard ingredients of gin, cherry liqeur, and pineapple juice always stay the same. If you want to try your hand at it, the official recipe from the International Bartenders Association is below.
2 Parts Gin
1 Part Cherry Liqeur or Cherry Brandy
½ Part Benedictine
½ Part Cointreau
1 Part Lime Juice
Dash of Bitters
Dash of Grenadine
8 Parts Pineapple Juice
Combine all ingredients and mix with ice. Strain and serve straight up in a highball or hurricane glass. Garnish with cherry and pineapple.
Luis and I recently had the pleasure of flying on Asiana Airlines from San Francisco to Shanghai, via Seoul. As this was our first international flight, we upgraded the first leg to Asiana’s premium economy product, Smartium Economy. Smartium Economy is a fairly new product, which Asiana launched this past May on their newly delivered A350s. Since it is so new, there was not a lot of information available when we were first booking our flights. We were very excited to try this new product, even without knowing fully what to expect. We also wanted to see what the standard economy product was like on Asiana to compare the two offerings. With this goal in mind, we purchased the upgrade to Smartium Economy for the first of our four legs; travelling from San Francisco to Seoul. We were also able to get a very good deal on the flights by combining Google Flights with the travel rewards bonus of the Chase Sapphire Reserve.
Smartium Economy
The first important thing to note is that the seats in Smartium Economy are the same seats as in standard economy. Both Smartium Economy and regular Economy are configured 9 seats across, in a 3-3-3 setup. The seats are 18 inches wide in both cabins, which is nice as some airlines are shrinking seat width to 17 or even 16 inches. There are 4 rows of Smartium Economy seats, row 10 through row 14, for a total of 36 available seats.
Benefits
What Smartium Economy offers over it’s cheaper alternative is an additional 4 inches of leg room; increasing from 32 inches in Economy to 36 inches in Smartium Economy. Smartium Economy also offers an in-flight amenity package that includes an eye mask, toothbrush, tooth paste, and business class slippers, as well as a blanket and pillow. Standard economy seats, on the other hand, offer only the pillow, blanket, and economy slippers. I personally always travel with my own sleep mask, and did not feel that there was a particularly noticeable difference in the slippers offered in Smartium versus economy.
Smartium Economy Amenities
On the ground there were a few additional benefits as well. Smartium Economy passengers receive priority boarding at most airports that Asiana serves, and also qualify for access to the Asiana lounge at Seoul. This latter perk does come with a fairly major caveat, however. You are only entitled to access if you are booked in Smartium Economy for a long haul flight departing Seoul. This would be a flight to the United States, Europe, or Oceania. This means that even though we had purchased Smartium Economy on a long haul flight, since it was from San Francisco to Seoul, we were not permitted into the lounge. This was disappointing, especially since the cost of a Smartium Economy seat is the same inbound and outbound but the offered perks are diminished.
Cost
Smartium Economy is currently on a flat rate pricing structure. Long haul flights, which are any flights outside of Asia, are $150 US per seat. Flights within Asia are either $30 for Japan, China, and northeast Asia, or $60 for flights to or from the rest of Asia. This is pretty much on par with the cost of economy plus or premium economy seats on US carriers. For example, prices for Economy Plus on an upcoming United flight start at $159 for transpacific, and $49 for domestic.
Value
Ultimately I did not feel that Smartium Economy was worth the cost, especially when flying from the United States. We never really used the additional amenities, and I did not really notice a difference in the slippers offered in economy versus Smartium. Surprisingly, I also didn’t really notice the extra leg room. Normally I feel fairly cramped on airplanes, but the 32 inches of leg room offered in regular economy felt comfortable. Many American carriers now have a seat pitch of only 29-31 inches, so Asiana’s standard offering already felt like an upgrade. Priority boarding also felt unnecessary. Despite the large number of passengers needing to board, the process was incredibly quick and smooth. Also, the A350 offers ample storage space for bags, so boarding early did not offer much of a benefit.
The best potential benefit would be access to the lounge in Seoul, but the value of that perk depends largely on how long of a layover you have. It is also important to note that the lounge accepts Priority Pass. That means you may already have access, even without spending the $150 on Smartium Economy. I highly suggest you apply for a travel card with Priority Pass as a benefit if you don’t already have one.
The Asiana Experience
Overall, Asiana was an excellent airline to fly. Compared to the legacy carriers common in the United States, Asiana was significantly nicer. The seat size, even in standard economy, was comfortable at 18 inches wide and 32 inches deep. Boarding was also very quick and efficient. We started boarding 30 minutes before takeoff, with one line for Smartium and one for economy. In less than 20 minutes everybody was in their seats and the flight attendants were making their initial rounds to prepare us for an on time departure. The flight attendants were also very professional and friendly. They did not all speak fluent English, which was not unexpected on a Korean based airline, but there was never any problems with communication.
Meals
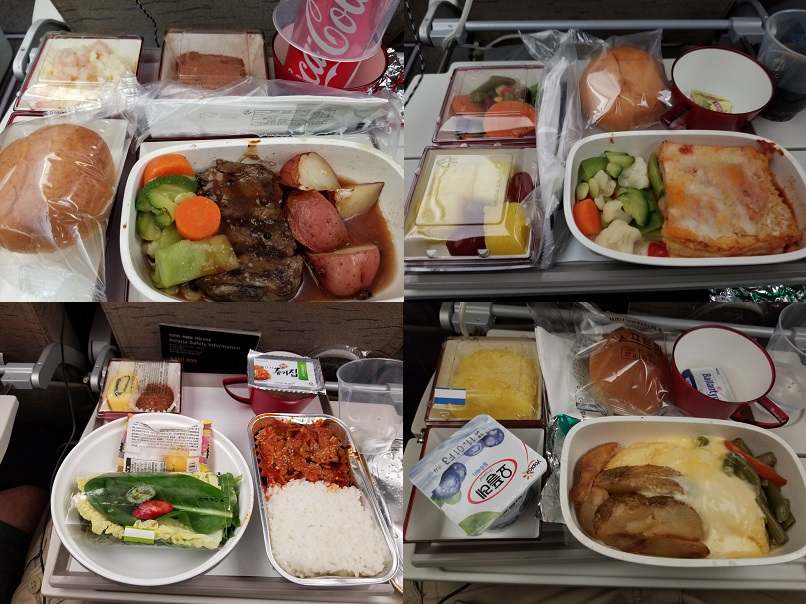
On the transpacific flight we were given two full meals as well as a snack. The first meal was offered shortly after we reached cruising altitude, and was a choice between a Korean bibimbap or a steak and veggies dish. Both entrees were served with a biscuit, shrimp slaw, and a small desert cake. We were served the second meal two hours before our scheduled landing. We had a choice of a fish meal or a chicken lasagna. The snack was finger sandwiches and was offered midway through the flight. The meals on the return flight included a spicy beef and rice dish for the first meal. Since we were landing in the morning, the second meal offered was a breakfast omelette.
Meals Offered on Our Flights
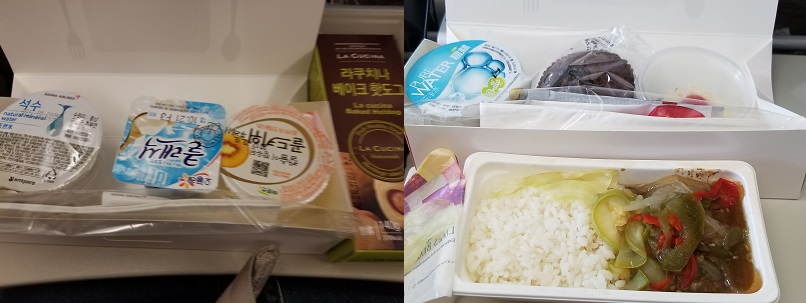
The flight from Seoul to Shanghai was significantly shorter, just over 2 hours. Because of the short flight time I was not expecting anything more than the standard offerings of peanuts or cookies that we expect domestically. Instead we were given a snack that included a yogurt and a pig in a blanket. On the return flight the snack was a beef and rice dish served with a muffin and fruit cup. The meal offerings were plentiful and spaced perfectly throughout the flight. The seats in economy, and even in Smartium Economy, were a little cramped when trying to eat a meal, but nothing too unpleasant.
Asiana Snacks
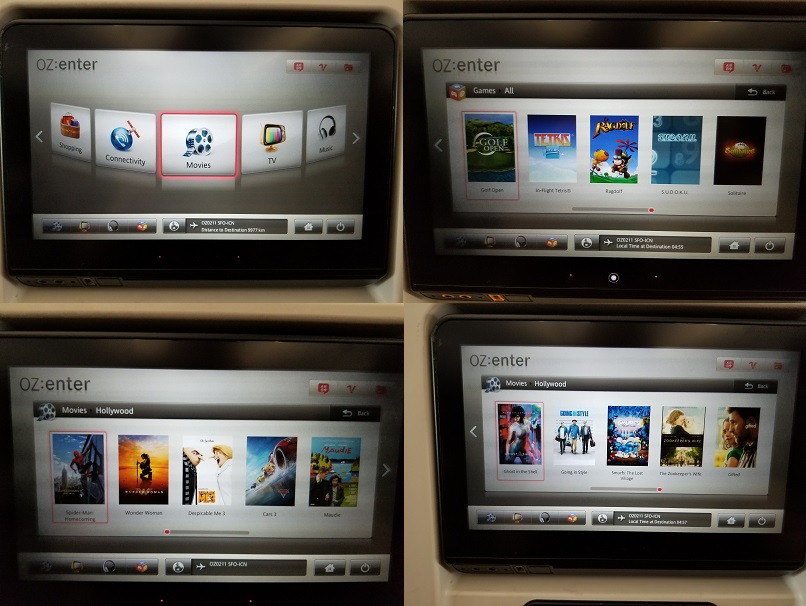
In Flight Entertainment
Each seat had a 12 inch touch screen entertainment center in the seat back in front of them. The entertainment center had options for movies, tv shows, music, games, flight map, and communication. A remote was also offered which was useful for some of the games, but for the most part I found the touch screen to be most convenient. The movie selections were excellent, with a variety of options ranging from recent blockbusters to classics. There were several movies with English, Korean, Chinese, or Japanese audio and enough selection for me to spend the entire flight watching movies. I have a hard time sleeping on planes, so I ended up staying up and watching movies for the entire 12 hour flight. There was a total of about 30 English movies available.
Asiana’s In Flight Entertainment Options
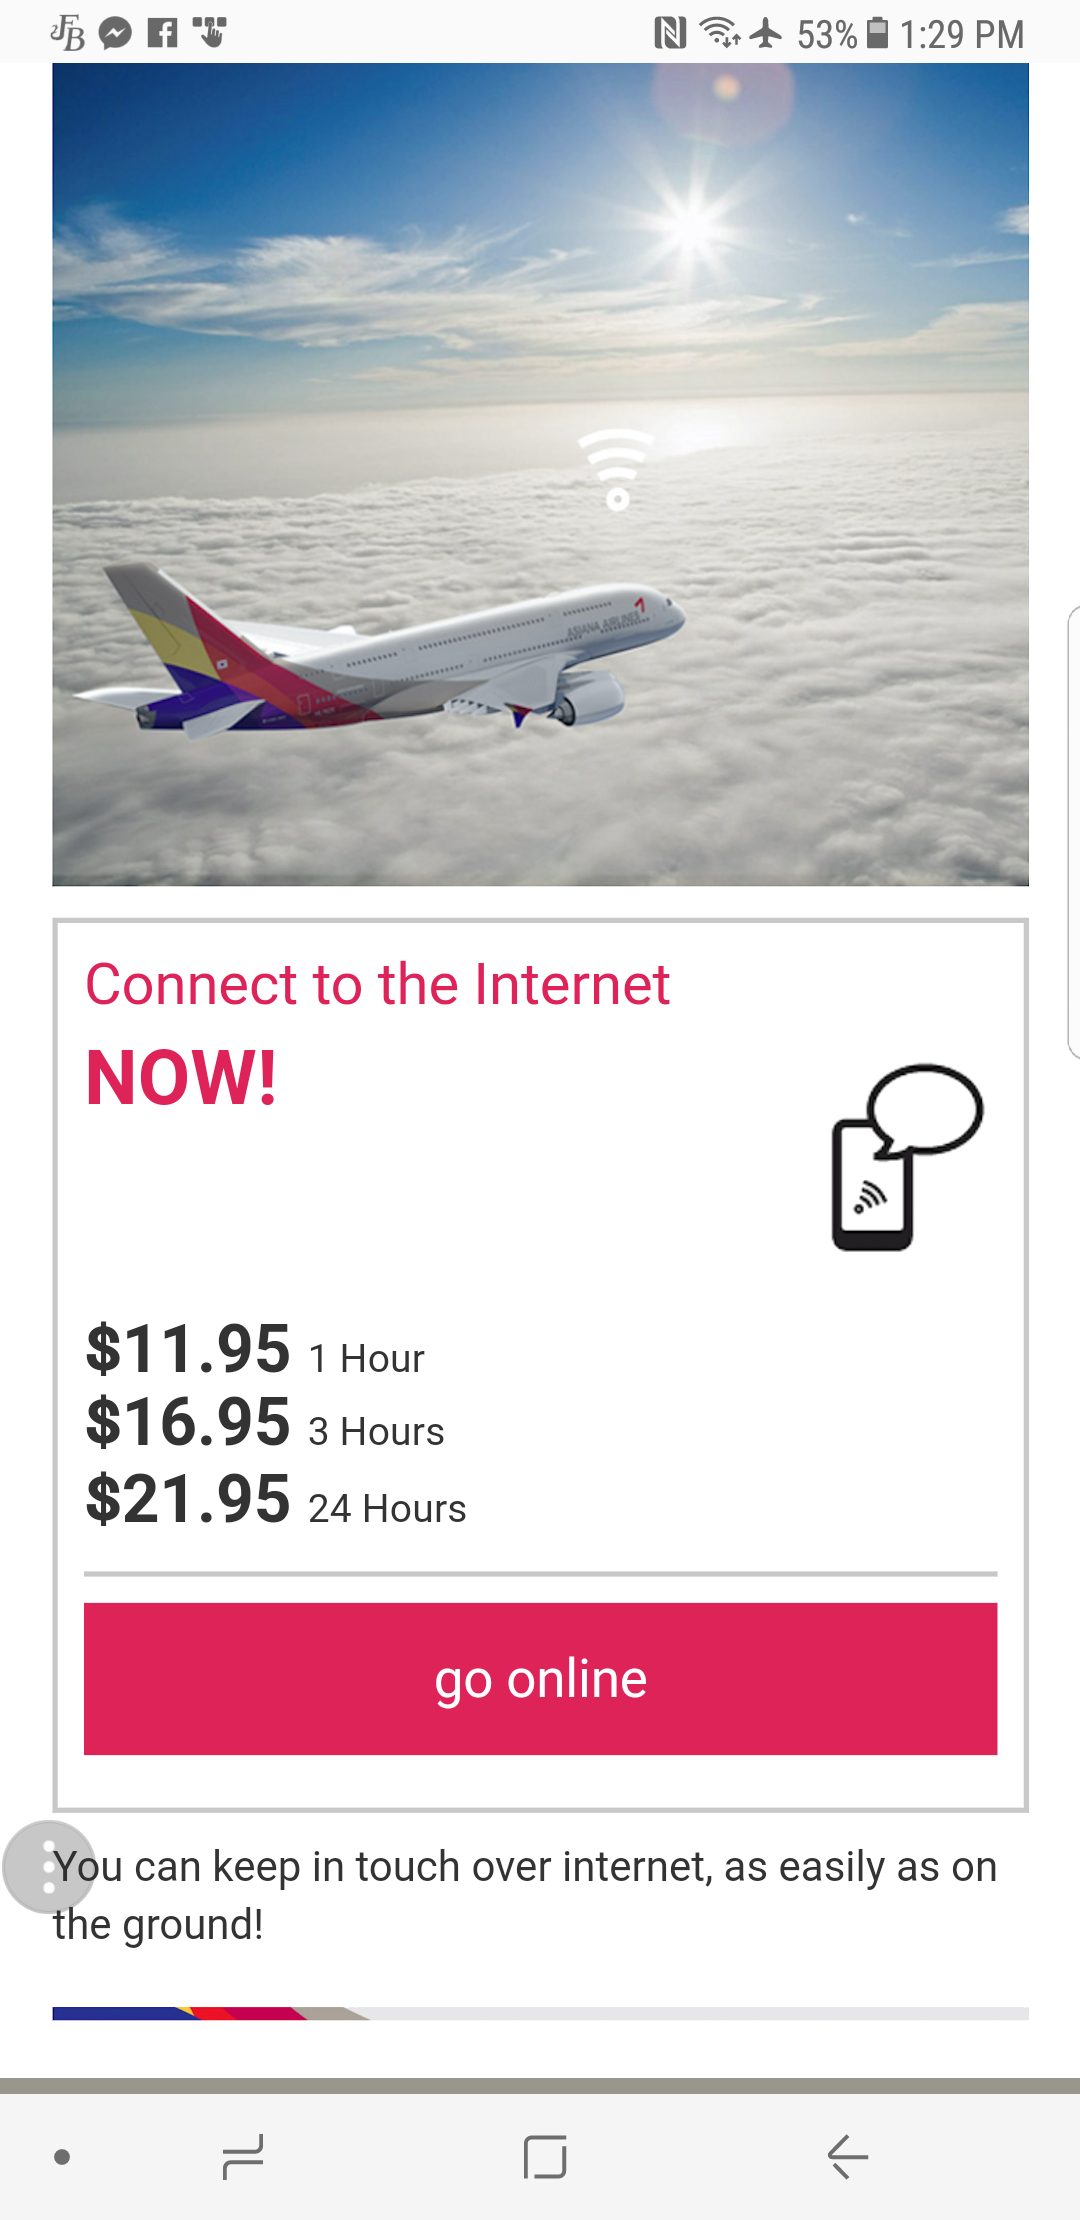
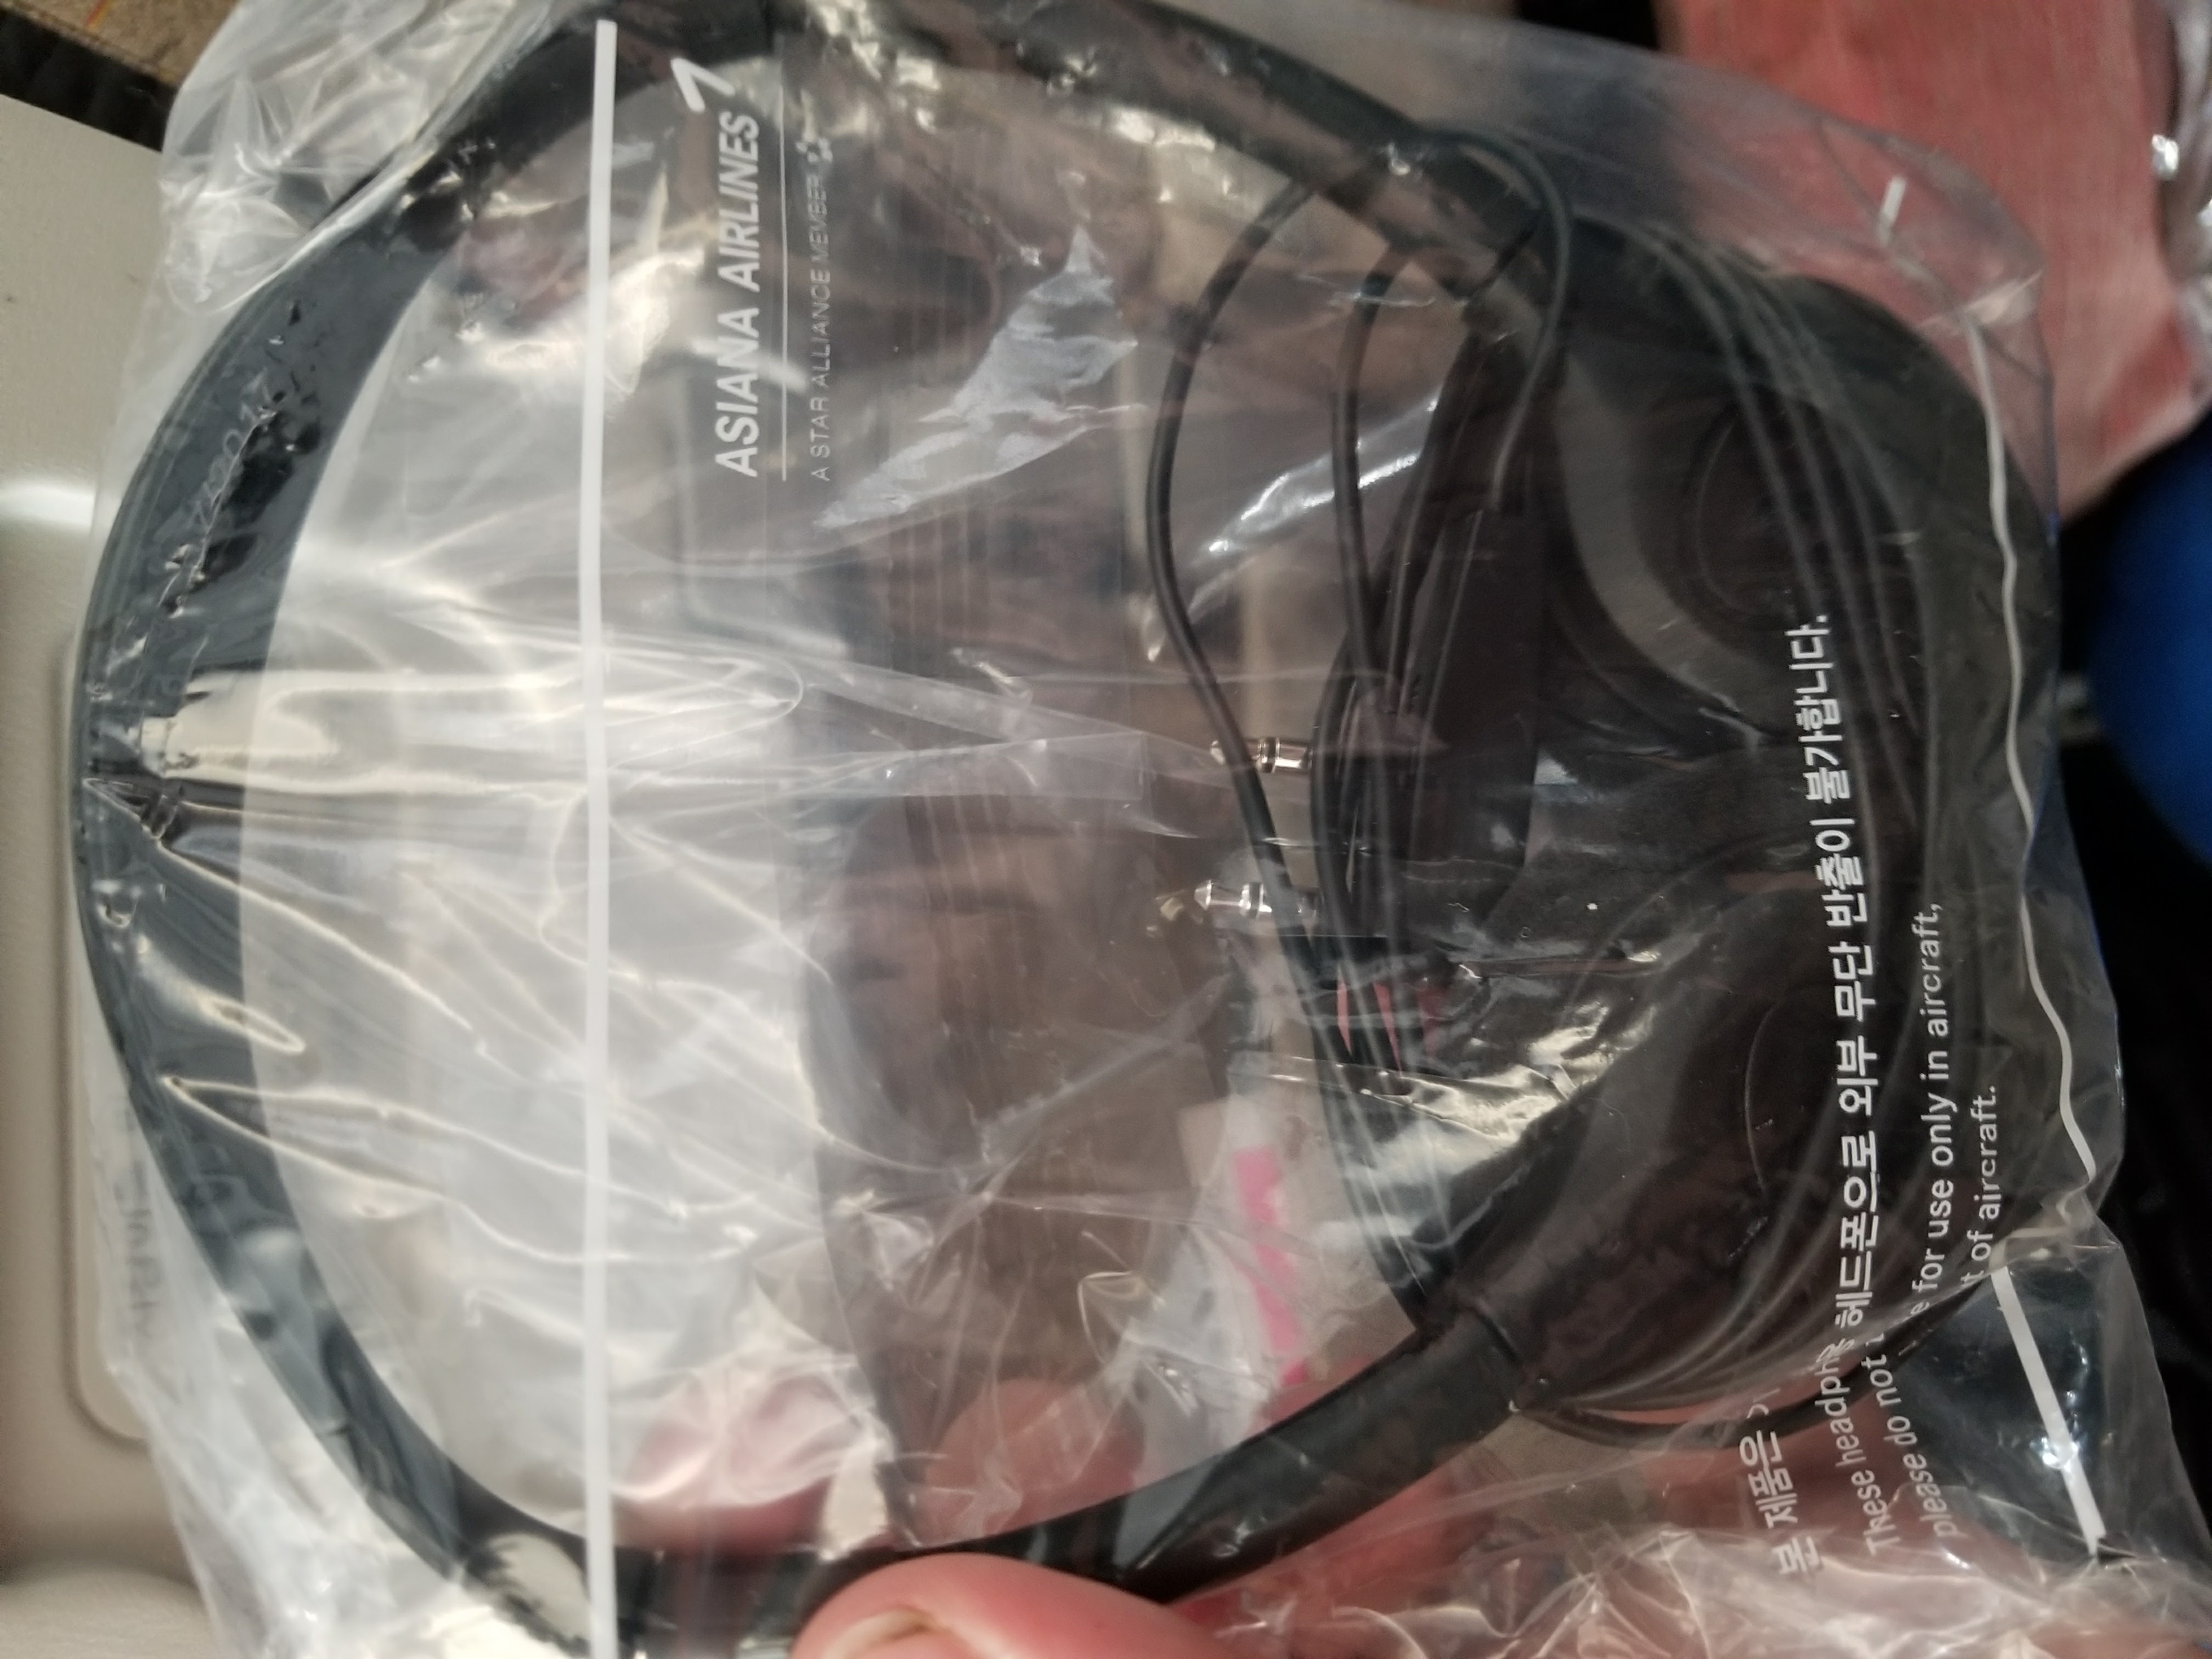
Asiana also offered earphones in each seat, although I found the audio quality to be lackluster and ended up using my personal earbuds the entire flight. The entertainment center had a USB slot next to the headphone jack to charge a device. There was also a universal plug between the seats for devices that couldn’t be charged via USB. The games available on the entertainment center included several casual puzzle games, such as solitaire and sudoku. There was also a golfing game and a couple of basic platformers. These games seemed to work much better with the available remote than the touchscreen. Wi-Fi was available for the duration of the flight, ranging from $12 for 1 hour to $22 for the entire flight.
Wi-Fi Pricing OptionsComplimentary Headphones
The Airbus A350
Asiana’s Airbus A350 was an extremely comfortable plane. The bulkheads offered ample storage which made the boarding process extra smooth. People could easily find space near their seats and quickly store their carry-ons. Take off and landing was also incredibly smooth, probably the smoothest experience I have ever had on a plane. Despite the large engines the noise was almost non-existent.
The one main downside to the plane was the climate control. Unlike most other aircraft, seats on the A350 do not have individual climate control. Instead, the entire cabin’s climate is controlled by the flight attendants. On our flight to Shanghai I was quite comfortable, but it depends highly on the crew. Our return flight was much warmer than I am used to on a flight. I walked past the galley on a trip to the bathroom and was able to see the thermostat. The economy cabin was set to a rather toasty 78 degrees. Personally I would much rather having my own control over air to my seat, or for the cabin temperature to be colder. It is easier to add blankets or a jacket to warm up when cold than it is to cool down when the plane is too warm.
Conclusion
Overall our experience on Asiana Airlines was exquisite. The seats were comfortable, the food plentiful, and the in flight entertainment was vast. Despite the extremely long flight, the journey was comfortable and we were entertained throughout. Asiana’s economy product was more than comfortable enough for a transpacific flight. I would not hesitate to fly Asiana again, although I most likely would not pay for the Smartium Economy upgrade next time.
At their event in San Francisco this past Wednesday, Google made a number of announcements. Of particular interest to those who travel often was the new Pixel Buds. Starting at $159, the Pixel Buds are a pair of wireless earbuds. While clearly Google’s answer to Apple’s Air Pods, Google’s version brings so much more to the table. When paired with an Android the ear buds offer audio control via a touch sensitive outer shell. They also provide direct access to Google’s Assistant (think Siri if you have an iPhone). However, the real gem comes with the pairing of the Pixel Buds with Google Translate.
The Magic of the Pixel Buds
Automatic translation is a mixed bag, but it has made travel significantly easier. Whereas before you would have to look up each word in a dictionary, now you just need an internet connection and there are dozens of services that will allow you to quickly translate between hundreds of languages. The Pixel Buds take this one step further with near real-time audio translation. When paired with the new Pixel 2 cellphone, the Pixel Buds can listen for a foreign language. When they detect another language the Pixel Buds will wait for the sentence to be finished and then translate it directly in your ears. The audio feature currently works with 40 languages.
Aside from giving you a translation of what other’s are saying, the ear buds can also translate what you say. All you have to do is ask Google to help you speak a supported language and then talk. Each sentence will be translated and played through the phone handset. By combining these two features you can have a near fluent conversation in any of the supported 40 languages. Google Translate itself supports over 100 languages, so it is possible that in time the Pixel Buds will support even more languages.
Google Translate Without the Pixel Buds
If you don’t want to shell out the $159 for a pair of earphones and another $649 for the Pixel 2 phone, you are not out of luck. With any smartphone you can download the Google Translate app which is extremely powerful. The app supports over 100 languages and allows you to translate by typing, speaking, or photographing text. It also has the ability to download specific language packs for offline use so you don’t have to worry about roaming to translate when you are travelling internationally. Some languages will also allow you to draw the letters on your screen so you don’t need to download an international keyboard.
Text Translations
The most basic translation ability offered by the app is text translations. Simply select the language you are typing in and the language you want to translate to and then start typing. The application will offer auto-complete suggestions, and when you finish what you want to say it will be translated. For a language that uses a different alphabet, such as Japanese, the application will show the translation in the native alphabet, as well as how it would appear if written in your alphabet. There are also volume icons next to each language that will play a very natural sounding audio of what you typed.
The application also offers you the ability to save commonly used phrases in a phrase book. This allows you to quickly pull up phrases that you are likely to use often. For example, you might want to save the phrase for calling a taxi, or the address of your hotel. There is a link in the main menu to visit your phrasebook. Going to the phrasebook page will show you all the translations you have saved, and clicking on a translation will take you to the main text translation page. The one main downside is there is no way to filter the phrasebook by language. If you travel to several different countries this can become problematic as you try to find the relevant language for your current trip.
Audio Translations
Similar to the Pixel Buds, the main Google Translate app also allows for audio translations. From the main text translation page there is a microphone icon. This will take you to the Speech page which allows you to talk in either of the two languages you are translating between. The application will automatically detect which language is being spoken and will translate and play audio of the translation in the other language. You can also click on the translation to be taken to the text translation page.
This feature still has several problems with proper nouns; for example when trying to translate “Take me to Shin-Yatsushiro station please”, the application tried to translate it as “Shin Sushi Roll” instead. It took three tries, but finally the application was able to properly understand and translate what I wanted it to. If there is not too long of a pause, the microphone will continue listening, allowing for an entire conversation to happen between the two languages. It is far from perfect, and sometimes can have a difficult time detecting the proper language, but it is still a wonderful tool for international travel.
Photo Translation
Original sign (top) and the translated version (bottom)
My personal favorite feature of Google Translate is the photo translation tool. Clicking on the camera icon on the main page will enable your phone’s camera with a message to “Align Text”. All you need to do is align the text in your camera’s view and the translation will appear over the image on your screen. This uses a form of augmented reality, and is wonderful for reading signs, menus, and other written text. It can be a little temperamental at times, a slight angle change can cause the translation to change. Pictures with a lot of surrounding text can sometimes confuse the application as well. In this situation it can be helpful to turn off the “Instant Feature” by clicking on the eye icon. This allows you to take a picture, and then use your finger to highlight the words to translate.
Google Translate is available via iTunes or Google Play. Make sure to download it before your next trip.
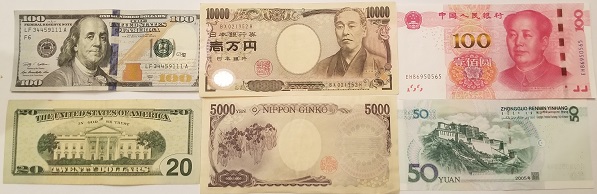
One of the unique things to think about when travelling internationally is the logistics of foreign currency. In America the majority of stores and restaurants will accept credit cards, but that is not always the case. In many countries cash is king, and being stuck without cash on hand could be extremely problematic. That is why it is crucial to know how and where to get local currency. Equally as important, you need to know how to get the best exchange rate when purchasing foreign currency.
Paying with a Credit Card (in the Local Currency)
Often the best exchange rate you will get comes directly from the major card issuers. Visa, MasterCard, and American Express all calculate their own exchange rates, and often they are the best rates available. The rates between the three issuers are often very close to one another, although MasterCard often has a slight edge. When you make a purchase with your credit card, as long as the merchant charges in the local currency, you benefit from the exchange rate calculated by your card’s issuer.
Aside from the card issuer, you also have to consider the bank that issued you the card in the case of Visa and MasterCard. Many cards will charge a small fee on every purchase made in a foreign currency. 3% is a common fee, and while it appears small, it can add up significantly over the course of a vacation. That being said, there are a large number of cards that do not charge any foreign transaction fee. It is a very good idea to have at least one card in your wallet that does not charge a foreign transaction fee.
Using a Debit Card in a Local ATM
Just as with credit cards, debit cards use the exchange rate set by the issuing bank, almost always Visa or MasterCard. It is very important, however, to choose the local currency if the ATM gives you a choice. If you use an ATM in China and request US Dollars, for example, the ATM determines the exchange rate. This rate will often be significantly worse than the direct rate offered by the card issuer. This also gives you the great benefit of having local cash, in case the need should arise.
Also like credit cards, there are fees that can be charged depending on the bank the debit card is attached to. Although not as common as credit cards with no foreign transaction fees, there are a few banks that do not charge any withdrawal fees for using out of network ATMs. A few banks will even reimburse you for any fees charged by the bank that owns the ATM. USAA, if you qualify for an account, and Charles Schwab are two such banks. For other banks the fee charged could be a flat amount, such as TD Bank’s $3 fee per withdrawal, a percentage of the withdrawal amount, such as Ally Bank’s 1% per withdrawal, or a combination, such as Chase Bank’s fee of $5 plus 3% of the withdrawal amount. This fee is separate from any fee charged by the bank that owns the ATM.
Purchasing Foreign Currency From Your Local Bank
One option for obtaining foreign currency before you travel would be to purchase currency from your local bank. Not all banks will offer this option, and each bank that does sets their own exchange rate. This rate is often worse than the direct rate offered by Visa or MasterCard, typically by around 5%. Aside from the worse exchange rate, banks will often charge an additional shipping fee to deliver the foreign currency to your home or a local branch of your bank.
This option is typically only available if you have an account with the bank in question. For example, Wells Fargo and Bank of America both offer foreign currency purchases, but they require you to pay with your associated checking or savings account. With the exchange rate being approximately 5% worse and an added shipping fee, it might seem like a bad idea to purchase currency. However, it could be necessary or just extremely convenient, depending on your plans when you arrive. For example, if you are arriving in a country via cruise ship or over land rather than flying, there may not be a convenient ATM. Having cash on hand when you first arrive can be invaluable, both to save time and in case you need cash before being able to find an ATM.
Using a Dedicated Currency Exchange Service
The last option we will discuss is to use a dedicated foreign currency exchange service. You can find these in almost all major airports, and as such it can be the most convenient option if you find yourself needing foreign currency on very short notice. Unfortunately, this convenience comes at a cost; these services often have the worst exchange rates you will find. Travelex is one of the largest and most well known exchange services. Based in London with over 1,500 stores across 27 countries; you can almost always find a Travelex. The rates are often 10-15% worse than the rate offered by the banks, along with an additional processing fee.
Sample Exchange Rates
Below is a table showing the exchange rates and fees for the different options discussed above. These rates were taken as of September 20th, 2017, and show the cost of purchasing 20,000 Japanese Yen using each option. For Visa and MasterCard, we assume that you have a card that does not charge a foreign transaction fee.